WebDocuments Setup Guide
Integration with LibreOffice Online service allows to deploy IceWarp WebDocuments in several ways, but we recommend running it on a separate server or at least in a separate virtual machine.
With this method, you will run WebDocuments on virtual machine preconfigured by us. If you prefer to run WebDocuments on your own Virtual Machine, check also option APT repository (VM with Debian8 is required).
This method is the easiest way for you to setup WebDocuments on Windows. With this method, you will run WebDocuments on a virtual machine preconfigured by Icewarp. If you prefer to run WebDocuments on your own Virtual Machine, check also option APT repository (VM with Debian8 is required).
This method seems to be the easiest way for you to setup WebDocuments on Linux. With this option, you will run WebDocuments on the same server as IceWarp. At the same time you can choose the APT Repository option (and also have WebDocuments on the same server as IceWarp) or Preconfigured VM option (then WebDocuments will be not on the same server as IceWarp).
If not already done, install Docker on your server. For complete list of supported operating systems and installation instructions please visit https://docs.docker.com/installation/. We support Docker with Linux platforms only as enabling Docker on Windows is not supported. We recommend using standalone server (either physical or virtual one) on Windows platforms.
This method seems to be the easiest way for you to setup WebDocuments on 64bit Debian8. You can either have WebDocuments on the same server as IceWarp or you can use a different virtual server for WebDocuments only. You can also choose the Docker option (and have WebDocuments on the same server as IceWarp) or choose Preconfigured VM option (then WebDocuments will be not on the same server as IceWarp).
VMware ESXi
 VIEW LARGE
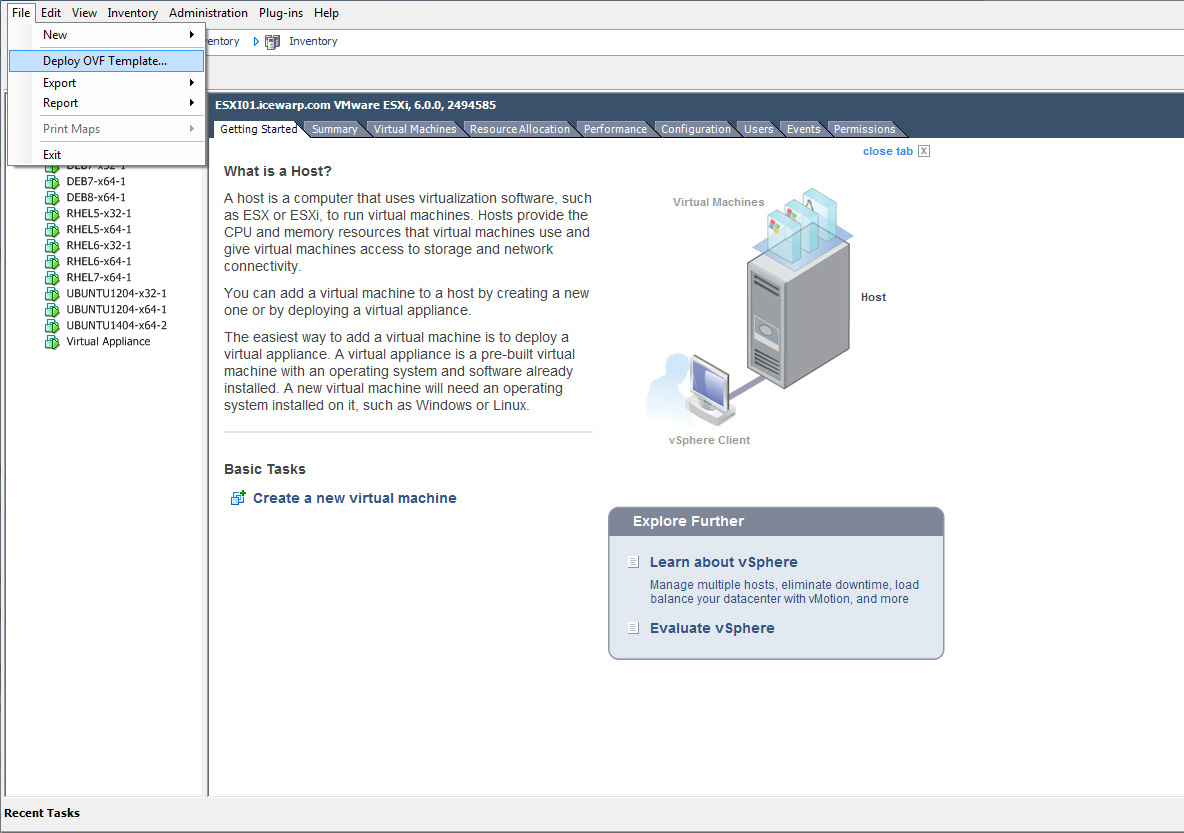
Import VM
- Download image zip archive and extract it (VM will not run from the extracted folder)
DOWNLOAD - Open vSphere client (or other manager like Workstation) and deploy OVF Template
- Open OVF Template file and click next
- Review template details, click next
- Fill in a name for the VM (the default value is just fine), click next
- Select datastore and disc type - we recommend default setting (lazy zeroed). Eager zeroed will result in slower import.
Click next learn more about disk types at: https://communities.vmware.com/message/2199576 - Revise settings and check „Power on after deployment“, click finish
- Click close after deployment finish
- Manage virtual machine automatic start through VMware Workstation or vSphere WebClient - right-click hypervisor in the list in left pane and pick "Manage AutoStart VMs..."
- Tick the box on the left from imported VM in the Configure AutoStart dialog.
- Click OK to apply changes

Assign IP address to VM
Choose the way you want to provide the IP address for the VM. Basically there are two options either go with DHCP or configure a static IP in NIC settings inside VM. Only IPv4 is supported.
- DHCP: There is no need to change anything in the image if DHCP is used. Just configure your DHCP server to assign the same IP address each time (IP reservation according to MAC)
- Static IP: This must be setup later, please proceed further and follow step 4

Start the Virtual Machine
Power on (if not already done during import) the Virtual Machine by selecting Start from VM Power menu or its dashboard.
-
In terminal run:
apt-get update && apt-get upgrade
Configure Static IP (optional)
To change the IP address you need to do following:
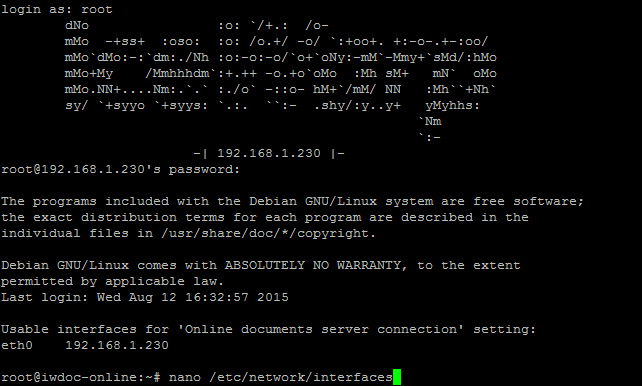
- Login to VM with following details: user: root password: changeIT
- Open file /etc/network/interfaces (use nano or vim)
- Remove:
iface eth0 inet dhcpAdd:
auto eth0
iface eth0 inet static
address *.*.*.* (your static IP address here)
netmask *.*.*.* (your subnet mask here)
gateway *.*.*.* (your default gateway here)More at: https://wiki.debian.org/NetworkConfiguration#Configuring_the_interface_manually - Reboot VM
Configure IceWarp Server
Configure your instance(s) of IceWarp Server to connect to the WebDocuments service provided by deployed VM. To achieve this:
- Obtain IP assigned to imported virtual machine, the ip should be visible on terminal or SSH login screen under the IceWarp logo
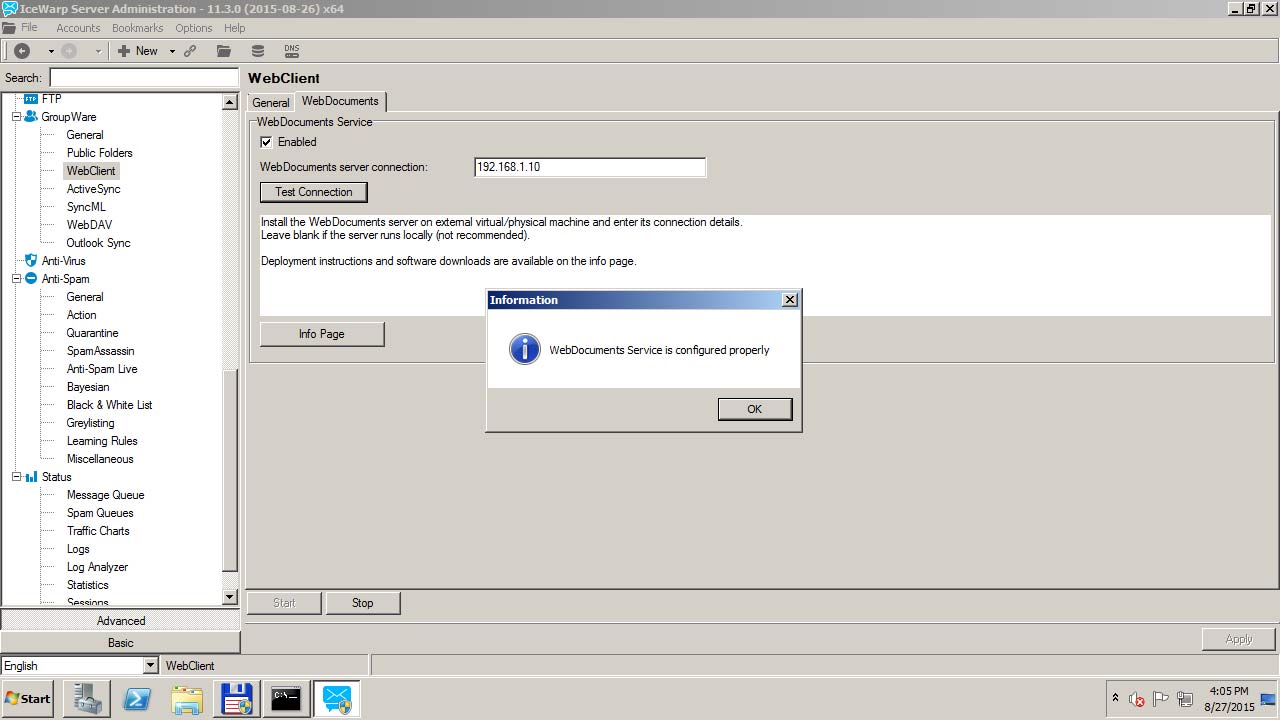
- Open IceWarp Administration Console and insert IP address of VM into "WebDocuments server connection" input located at GroupWare / WebClient / WebDocuments tab
- Enable "WebDocuments Service"
- Check that the configuration is correct by clicking "Test Connection“ button
- Save configuration changes by clicking on Apply button
- Review WebDAV URL settings (Groupware / WebDAV), URL must be reachable from imported VM
- Your IceWarp Server must be able to send out tcp packets to destination port 9980

Import VM
To enable Hyper-V role on your Windows Server OS follow
https://technet.microsoft.com/en-us/library/hh846766.aspx#BKMK_SERVER
The process is quite similar on all relevant Windows Server versions.
- Download image zip archive and extract it (VM will run in the extracted folder!)
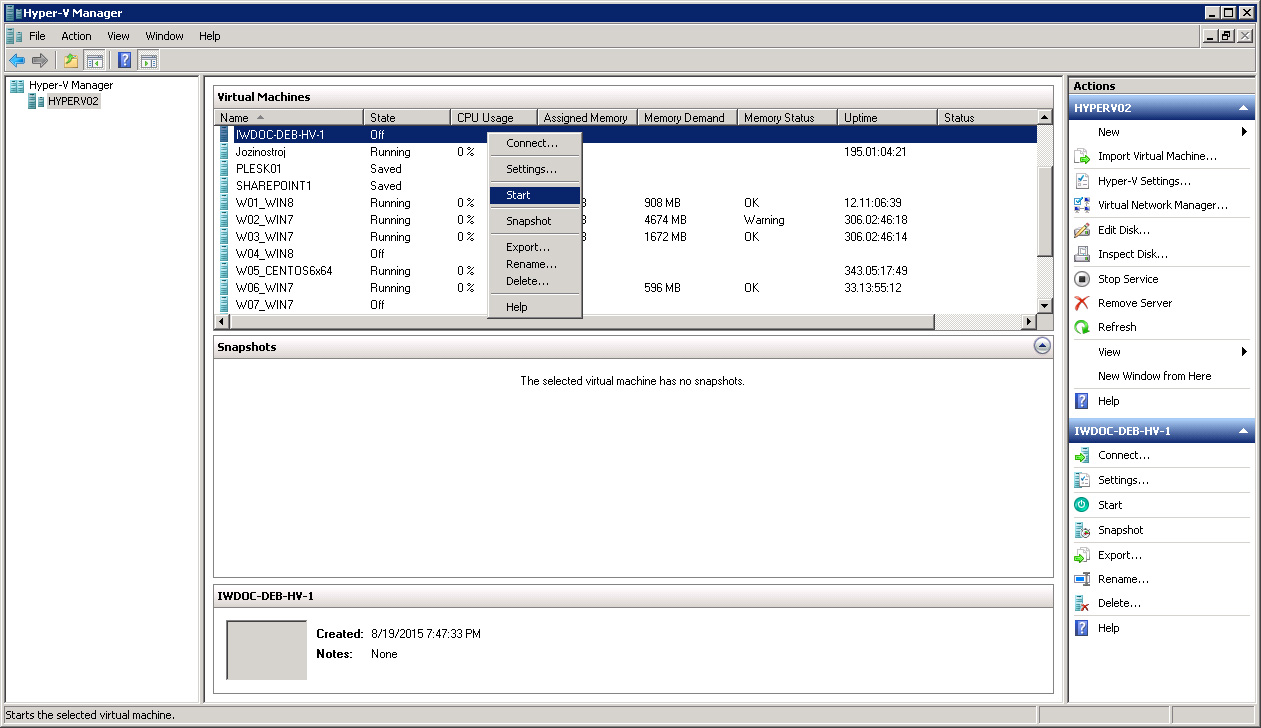
- Open Hyper-V Manager (located in Administrative Tools or Server Manager)
- Click "Import Virtual Machine..." option located on top of Actions pane (on the left)
- Browse to the location where you extracted VM image and select the root folder containing VM files.
- Choose import settings, both options are ok, but rather go for "Copy the virtual machine (create new unique ID)" option. Press "Import"
Assign IP address to VM
Choose the way you want to provide IP address for the VM. Basically there are two options either go with DHCP or configure a static IP in NIC settings inside VM. Only IPv4 is supported.
- DHCP: There is no need to change anything in the image if DHCP is used. Just configure your DHCP server to assign the same IP address each time (IP reservation according to MAC)
- Static IP: This must be setup later, please proceed further and follow step 4
Start the Virtual Machine
Importing will add new virtual machine to list of all guest machines. You can start it either by right licking the machine or by left-clicking "Start" item in Actions pane. Start progress is displayed in Status column in Hyper-V Manager. Double-clicking the machine in the list will bring up VNC console, booted VM will display IceWarp logo together with machine ip.
-
In terminal run:
apt-get update && apt-get upgrade

Configure Static IP (optional)
To change IP address you need to do following:
- Login to VM with following details: user: root password: changeIT
- Open file /etc/network/interfaces (use nano or vim)
- Remove:
iface eth0 inet dhcpAdd:
auto eth0
iface eth0 inet static
address *.*.*.* (your static IP address here)
netmask *.*.*.* (your subnet mask here)
gateway *.*.*.* (your default gateway here)More at: https://wiki.debian.org/NetworkConfiguration#Configuring_the_interface_manually - Reboot VM
Configure IceWarp Server
Configure your instance(s) of IceWarp Server to connect to the WebDocuments service provided by deployed VM. To achieve this:
- Obtain IP assigned to imported virtual machine, the ip should be visible on terminal or SSH login screen under the IceWarp logo
- Open IceWarp Administration Console and insert IP address of VM into "WebDocuments server connection" input located at GroupWare / WebClient / WebDocuments tab
- Enable "WebDocuments Service"
- Check that the configuration is correct by clicking "Test Connection“ button
- Save configuration changes by clicking on Apply button
- Review WebDAV URL settings (Groupware / WebDAV), URL must be reachable from imported VM
- Your IceWarp Server must be able to send out tcp packets to destination port 9980
Get Docker File
- Open terminal
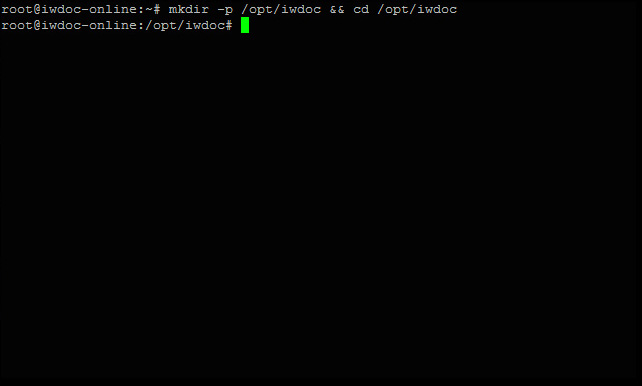
- Prepare destination folder and download Docker image inside
In terminal run:mkdir -p /opt/iwdoc && cd /opt/iwdoc
wget http://www.icewarp.com/download/tools/webdocuments/IWDOC-DOCKER.tar.gz
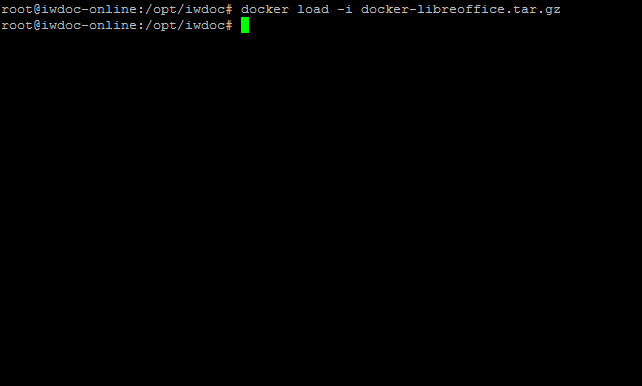
Loading the Image
In terminal run:
docker load -i IWDOC-DOCKER.tar.gz
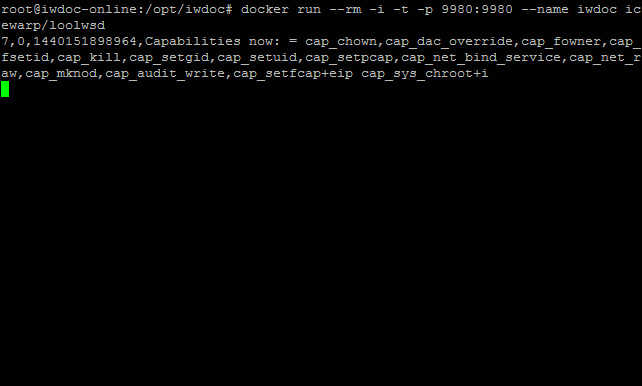
Run the Image
In terminal run:
docker run --rm -i -t -p 9980:9980 --name iwdoc icewarp/loolwsd
Configure IceWarp Server
Configure your instance(s) of IceWarp Server to connect to the WebDocuments service provided by deployed VM. To achieve this:
- Open IceWarp Administration Console and insert IP address of VM into "WebDocuments server connection" input located at GroupWare / WebClient / WebDocuments tab
- For common use case with Docker running on the same machine as IceWarp use 127.0.0.1
- In case Docker runs on different machine than IceWarp use IP of that machine
- Enable "WebDocuments Service"
- Check that the configuration is correct by clicking "Test Connection“ button
- Save configuration changes by clicking on Apply button
- You may need to configure docker container to use your DNS server or use ip in WebDAV URL in IceWarp
- To get help configuring DNS for docker, please consult its documentation (article "Configure a DNS server for use by Docker")
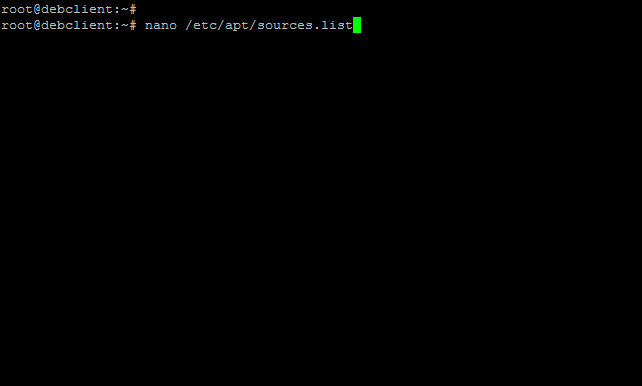
Edit apt sources
In terminal run:
nano /etc/apt/sources.list
- add following:
## official IceWarp online doc repository deb http://pkg.icewarp.com/debian icewarp main
It is also possible to use https in the source links, but in that case package apt-transport-https MUST be installed first!
We expect that standart package source is present already in sources file - e.g. deb http://ftp.us.debian.org/debian jessie main (mirror URL may vary depending your location).
- Close the file and save the changes.
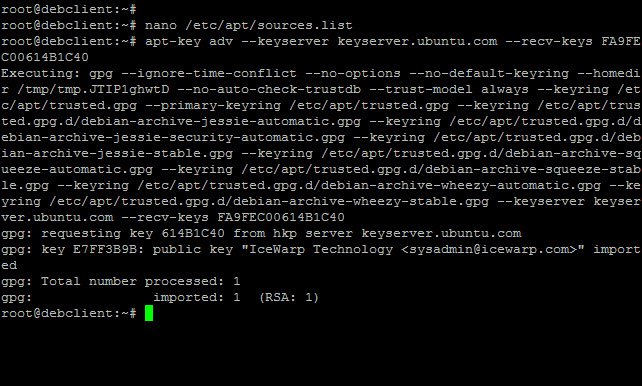
Import repository signing key
In terminal run:
apt-key adv --keyserver keyserver.ubuntu.com --recv-keys FA9FEC00614B1C40
Update apt database on your machine
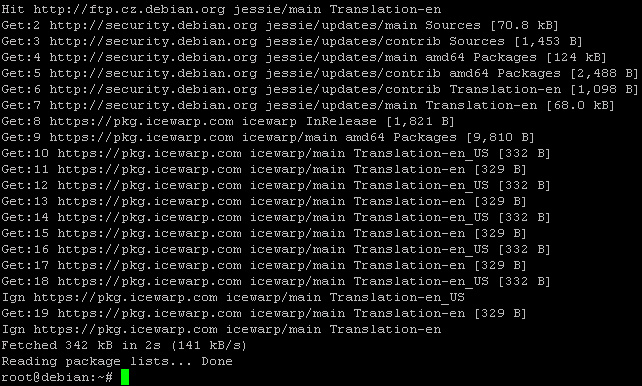
In terminal run:
apt-get update
Install IceWarp WebDocuments package
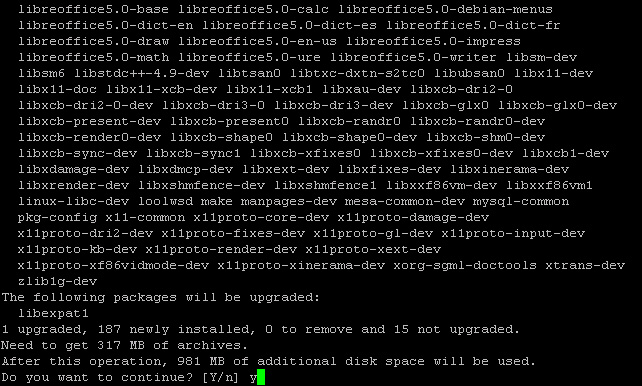
In terminal run:
apt-get install icewarp-doc
Enable automatic start of WebDocuments service on boot
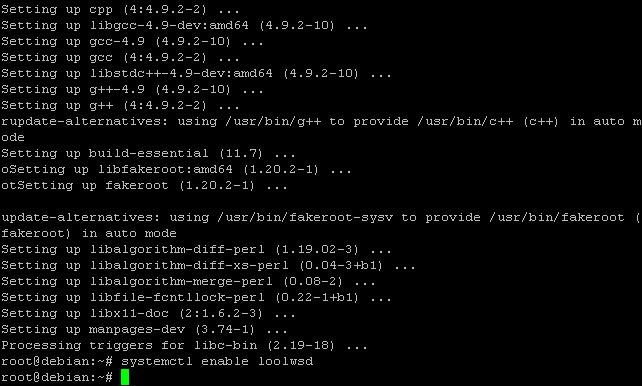
In terminal run:
systemctl enable loolwsd.service
Configure IceWarp Server
Configure your instance(s) of IceWarp Server to connect to the WebDocuments service provided by deployed VM. To achieve this:
- Obtain IP assigned to imported virtual machine, the ip should be visible on terminal or SSH login screen under the IceWarp logo
- Open IceWarp Administration Console and insert IP address of VM into "WebDocuments server connection" input located at GroupWare / WebClient / WebDocuments tab
- Enable "WebDocuments Service"
- Check that the configuration is correct by clicking "Test Connection“ button
- Save configuration changes by clicking on Apply button
- Review WebDAV URL settings (Groupware / WebDAV), URL must be reachable from imported VM
- Your IceWarp Server must be able to send out tcp packets to destination port 9980